This is one of our favorites. Peter used to make these for me as a side to our yummy salmon dinners. At some point I took over and started making them myself. In Houston we could find this dressing but I have not been able to find it in Denver. I did come across this variation recently and we were back on for our favorite spicy mashed potatoes.
I like to use one large russet potato and one small russet potato. I find that they make the perfect portion for two people.
Jalapeno Mashed Potatoes
2 russet potatoes, peeled and quartered
3 tablespoons jalapeno ranch dressing
1 tablespoon heavy whipping cream
3 tablespoons butter
cracked white pepper (can substitute black pepper)
kosher salt
jalapeno pepper, sliced thin (optional)
Boil the potatoes in a large pot for about 20 minutes. Use a fork to test the potatoes, When tender, drain and put back into pot. Add the butter and use a potato masher to mash the potatoes. Mix in the dressing, whipping cream, salt and pepper. Top with fresh jalapeno slices.
Monday, October 10, 2011
Jalapeno Mashed Potatoes
Wednesday, October 5, 2011
Goat Cheese Drop Biscuits
I absolutely adore goat cheese. I also adore biscuits. So when I found this recipe I knew I had to give it a try. I had it saved for while but the new baby kept me VERY busy so I'm just now getting around to posting this.
I managed to only get 9 biscuits though the recipe is supposed to yield 10. I guess I dropped big biscuits?
Goat Cheese Drop Biscuits
2 cups all purpose flour
1 tablespoon baking powder
1 teaspoon salt
4 tablespoons (2 ounces) goat cheese
1 cup buttermilk
6 tablespoons unsalted butter, divided
1/4 cup grated Parmesan cheese
garlic and herb seasoning, optional
Preheat oven to 425ยบ. Place a 10 inch cast iron skillet in oven during preheating.
In a medium bowl, whisk together flour, baking powder and salt. Using a pastry blender or your fingertips, cut in goat cheese and 4 tablespoons butter. Make a well in center and add buttermilk. Using a wooden spoon, stir ingredients until just moistened, adding up to a tablespoon more buttermilk if needed.
Remove the hot skillet from the oven and add 1 tablespoon butter. Once butter has melted, use a 1/4 cup measure to drop batter into skillet. Melt 1 tablespoon butter and brush over biscuit tops.
Bake for 14-16 minutes, until biscuits are golden on top. Remove from oven and sprinkle with Parmesan cheese and garlic and herb seasoning.
Yield: 10 biscuits
Adapted from Savory Spicy Sweet, originally from Art Smith
I managed to only get 9 biscuits though the recipe is supposed to yield 10. I guess I dropped big biscuits?
Goat Cheese Drop Biscuits
2 cups all purpose flour
1 tablespoon baking powder
1 teaspoon salt
4 tablespoons (2 ounces) goat cheese
1 cup buttermilk
6 tablespoons unsalted butter, divided
1/4 cup grated Parmesan cheese
garlic and herb seasoning, optional
Preheat oven to 425ยบ. Place a 10 inch cast iron skillet in oven during preheating.
In a medium bowl, whisk together flour, baking powder and salt. Using a pastry blender or your fingertips, cut in goat cheese and 4 tablespoons butter. Make a well in center and add buttermilk. Using a wooden spoon, stir ingredients until just moistened, adding up to a tablespoon more buttermilk if needed.
Remove the hot skillet from the oven and add 1 tablespoon butter. Once butter has melted, use a 1/4 cup measure to drop batter into skillet. Melt 1 tablespoon butter and brush over biscuit tops.
Bake for 14-16 minutes, until biscuits are golden on top. Remove from oven and sprinkle with Parmesan cheese and garlic and herb seasoning.
Yield: 10 biscuits
Adapted from Savory Spicy Sweet, originally from Art Smith
Thursday, August 11, 2011
Lemonade
Ok, so it has been pretty hot here in Denver. It's certainly not Houston hot (surface of the sun) but I have definitely been uncomfortable in the afternoons. A few weeks ago, after an especially hot trip to HomeGoods, I discovered the lemonade at Panera. I was instantly hooked and had to have more. I went back the next day and the next day...you see where this is headed. After about ten straight days of Panera lemonade I decided that I needed to cut back a little bit. I had to find a way to make my own lemonade at home!
I found several simple lemonade recipes online and borrowed from a few to create my own. It's the perfect cool-down for these hot August days!
Lemonade
1 3/4 cups sugar
7 cups water
1 cup lemon juice, freshly squeezed
In a small saucepan, combine the sugar and 1 cup of water. Bring to a boil and stir continuously to dissolve the sugar. Remove from heat and cool to room temperature. Cover and place in refrigerator until chilled.
Remove seeds but leave pulp in lemon juice. In a large pitcher, stir chilled syrup, lemon juice and 6 cups of water.
I found several simple lemonade recipes online and borrowed from a few to create my own. It's the perfect cool-down for these hot August days!
Lemonade
1 3/4 cups sugar
7 cups water
1 cup lemon juice, freshly squeezed
In a small saucepan, combine the sugar and 1 cup of water. Bring to a boil and stir continuously to dissolve the sugar. Remove from heat and cool to room temperature. Cover and place in refrigerator until chilled.
Remove seeds but leave pulp in lemon juice. In a large pitcher, stir chilled syrup, lemon juice and 6 cups of water.
Monday, August 8, 2011
Pepperoni Rolls
I have obviously been on a pizza kick lately. I guess the baby is a fan!
When I was at UT in Austin I used to love Double Dave's, especially their yummy Peproni Rolls. I probably ate way too many of these but man, they were so good! There are no Double Dave's locations in Denver so I decided to make my own. I searched for an authentic recipe but was not successful. I winged it because really, how hard complicated could pepperoni rolls be? My favorite pizza dough recipe, a few slices of Boar's Head pepperoni and some mozzarella chunks were all I needed to recreate a favorite! They made for a delicious Sunday night treat!
I used mozzarella cheese but you could also use smoked provolone.
Pepperoni Rolls
makes 8 rolls
1 ball pizza dough
4 large slices pepperoni, cut in half
8 pieces of mozzarella cheese, sliced lengthwise into 4 inch long "sticks"
1 large egg, combine with 1 tablespoon water to form egg wash
Parmesan cheese for topping
Preheat oven to 450 degrees.
On a flour dusted surface, roll out pizza dough into a rectangle, approximately 20 inches by 10 inches. Use a pizza cutter to divide the dough horizontally and then vertically into 4 smaller rectangles. Cut each rectangle diagonally so that you end up with a total of 8 triangles.
At the top (widest part) of each triangle, place 1 mozzarella stick on top of 1 piece of pepperoni. Roll the dough down over the cheese and pepperoni until you can fold the tip over the entire roll. Stretch the 2 ends out and under the roll. Carefully pinch close any holes to make sure that no cheese melts out during baking.
Space the rolls out evenly on a cookie or baking sheet, lightly greased or covered in parchment paper. Generously brush each roll with the egg wash. Bake for approximately 15 minutes, or until golden brown. While still warm, sprinkle with Parmesan cheese.
When I was at UT in Austin I used to love Double Dave's, especially their yummy Peproni Rolls. I probably ate way too many of these but man, they were so good! There are no Double Dave's locations in Denver so I decided to make my own. I searched for an authentic recipe but was not successful. I winged it because really, how hard complicated could pepperoni rolls be? My favorite pizza dough recipe, a few slices of Boar's Head pepperoni and some mozzarella chunks were all I needed to recreate a favorite! They made for a delicious Sunday night treat!
I used mozzarella cheese but you could also use smoked provolone.
Pepperoni Rolls
makes 8 rolls
1 ball pizza dough
4 large slices pepperoni, cut in half
8 pieces of mozzarella cheese, sliced lengthwise into 4 inch long "sticks"
1 large egg, combine with 1 tablespoon water to form egg wash
Parmesan cheese for topping
Preheat oven to 450 degrees.
On a flour dusted surface, roll out pizza dough into a rectangle, approximately 20 inches by 10 inches. Use a pizza cutter to divide the dough horizontally and then vertically into 4 smaller rectangles. Cut each rectangle diagonally so that you end up with a total of 8 triangles.
At the top (widest part) of each triangle, place 1 mozzarella stick on top of 1 piece of pepperoni. Roll the dough down over the cheese and pepperoni until you can fold the tip over the entire roll. Stretch the 2 ends out and under the roll. Carefully pinch close any holes to make sure that no cheese melts out during baking.
Space the rolls out evenly on a cookie or baking sheet, lightly greased or covered in parchment paper. Generously brush each roll with the egg wash. Bake for approximately 15 minutes, or until golden brown. While still warm, sprinkle with Parmesan cheese.
Monday, July 25, 2011
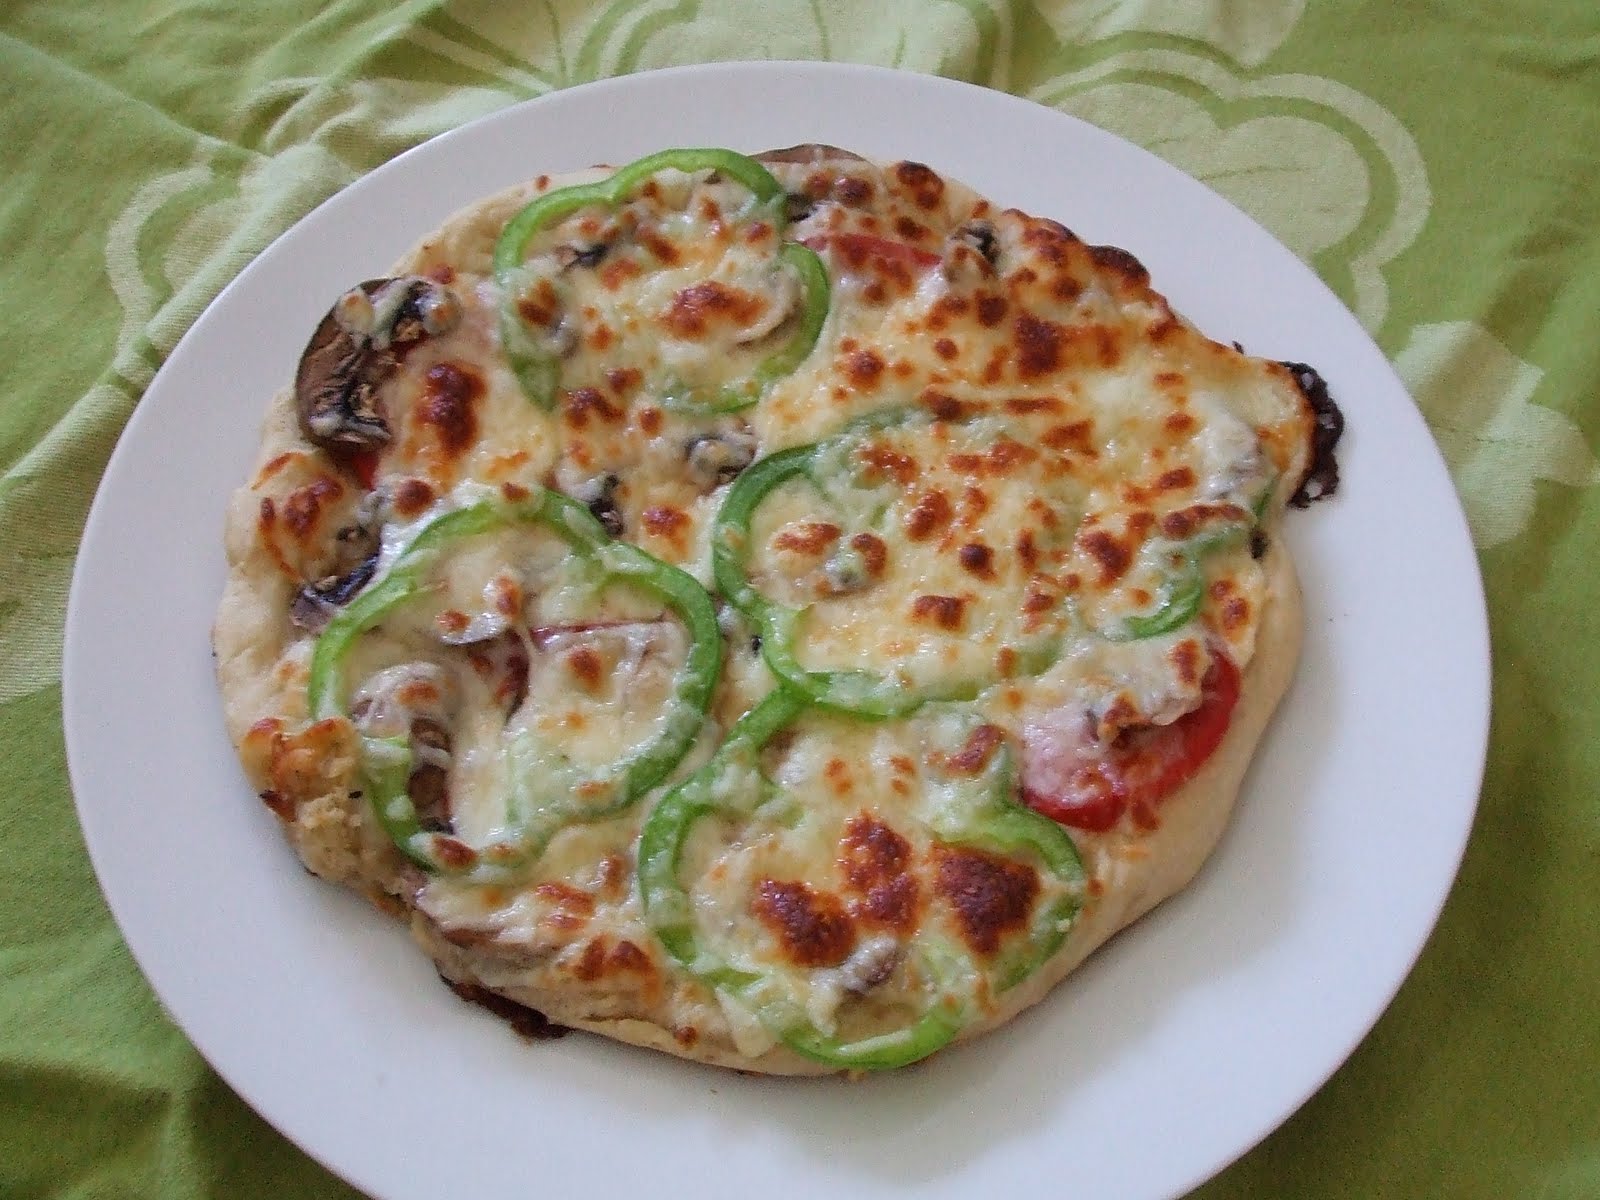
Cast Iron Veggie Pizza
It's no secret that I love pizza. One of my first cooking memories was making pizza with my mom when I was about 7 years old. In high school I worked at Fuzzy's Pizza where I worked my way up to assistant manager! Wow! When I was single and teaching, I used to make a big veggie pizza on Sunday and take it for lunch throughout the week. I have tried about a million pizza dough recipes, both regular and whole wheat. They were all just ok but I had yet to find one that reminded me of the dough at Dolce Vita. My friend Susan mentioned that this one was amazing...she was right! I think we have a winner!
I have always baked my pizzas in the oven but grilling pizza sounded very interesting. We don't have a grill available to us so I decided to get creative and use my cast iron skillet.
I really like to pile on the veggies but Peter hates broccoli on pizza so I left it out this time. I kept it simple with some tomatoes, green bell pepper, garlic and mushrooms. I don't like sauce on my pizza but you could certainly add your favorite sauce and it would still be yummy!
Vegetable Pizza
1 medium ball of pizza dough
1 tablespoon extra virgin olive oil
1 clove garlic, chopped
5 thin slices tomato- enough to almost cover the dough's surface
5 thin slices of green bell pepper
1 cup button mushrooms, cleaned and sliced thin
1 cup mozzarella cheese, shredded
1/4 cup parmesan cheese, shredded
Generously coat cast iron skillet with non-stick spray and place over medium heat. Coat your hands in olive oil and press the dough into a circle covering the bottom of the skillet. Watch the dough carefully and use a spatula to check occasionally. When the dough starts to firm up but before it begins to brown, add the pizza toppings to the dough. Continue to check the dough approximately every 45 seconds. When it has reached desired doneness, remove from the skillet.
I placed my pizza under the broiler for about a minute just to fully melt the cheese.
I have always baked my pizzas in the oven but grilling pizza sounded very interesting. We don't have a grill available to us so I decided to get creative and use my cast iron skillet.
I really like to pile on the veggies but Peter hates broccoli on pizza so I left it out this time. I kept it simple with some tomatoes, green bell pepper, garlic and mushrooms. I don't like sauce on my pizza but you could certainly add your favorite sauce and it would still be yummy!
Vegetable Pizza
1 medium ball of pizza dough
1 tablespoon extra virgin olive oil
1 clove garlic, chopped
5 thin slices tomato- enough to almost cover the dough's surface
5 thin slices of green bell pepper
1 cup button mushrooms, cleaned and sliced thin
1 cup mozzarella cheese, shredded
1/4 cup parmesan cheese, shredded
Generously coat cast iron skillet with non-stick spray and place over medium heat. Coat your hands in olive oil and press the dough into a circle covering the bottom of the skillet. Watch the dough carefully and use a spatula to check occasionally. When the dough starts to firm up but before it begins to brown, add the pizza toppings to the dough. Continue to check the dough approximately every 45 seconds. When it has reached desired doneness, remove from the skillet.
I placed my pizza under the broiler for about a minute just to fully melt the cheese.
Wednesday, July 13, 2011
Steak Rub
I have definitely been slacking in the blog department lately! As I get closer to my due date it's just harder for me to keep up with the blog. I feel so huge and I'm just not in the mood to cook! I'm digging into the archives and posting some recipes I have had on the back burner for a while.
I first used this steak rub back in April and Peter still raves about it! It is so easy and absolutely the tastiest steak I have ever prepared! I prefer to use a good, thick rib eye but this will work on any cut of meat.
Steak Rub
serves 2
2 1/2 tablespoons brown sugar
1 tablespoon chili powder (I use this one)
1 teaspoon kosher salt
1 teaspoon ground black pepper
Let steaks sit at room temperature for thirty minutes.
Combine the ingredients in a small bowl. Generously rub both sides of the steak until completely coated in the rub. Cover each steak tightly in plastic wrap and put in the refrigerator for a minimum of 4 hours. Overnight is best if you have the time.
Prepare steaks as you normally would. This is how I do it. Enjoy!
I first used this steak rub back in April and Peter still raves about it! It is so easy and absolutely the tastiest steak I have ever prepared! I prefer to use a good, thick rib eye but this will work on any cut of meat.
Steak Rub
serves 2
2 1/2 tablespoons brown sugar
1 tablespoon chili powder (I use this one)
1 teaspoon kosher salt
1 teaspoon ground black pepper
Let steaks sit at room temperature for thirty minutes.
Combine the ingredients in a small bowl. Generously rub both sides of the steak until completely coated in the rub. Cover each steak tightly in plastic wrap and put in the refrigerator for a minimum of 4 hours. Overnight is best if you have the time.
Prepare steaks as you normally would. This is how I do it. Enjoy!
Wednesday, June 22, 2011
French Fries
A few months ago I tried making oven baked parmesan fries. They were only so-so and this time I decided to try making the real deal crispy fried french fries.
I did a simple google search and this recipe had amazing reviews! I made these the other night when we had hamburgers. I thought they were pretty good but Peter raved about them so I decided they needed their own post!
Crispy French Fries
yields 2 servings
Slice potatoes into French fries, and place into cold water so they won't turn brown while you prepare the oil.
Heat oil in a large skillet over medium-high heat. While the oil is heating, sift the flour, garlic salt, onion salt, (regular) salt, and paprika into a large bowl. Gradually stir in enough water so that the mixture can be drizzled from a spoon.
Dip potato slices into the batter one at a time, and place in the hot oil so they are not touching at first. The fries must be placed into the skillet one at a time, or they will clump together. Fry until golden brown and crispy. Remove and drain on paper towels.
I did a simple google search and this recipe had amazing reviews! I made these the other night when we had hamburgers. I thought they were pretty good but Peter raved about them so I decided they needed their own post!
Crispy French Fries
yields 2 servings
10 ounces russet potatoes, peeled
1/4 cup all-purpose flour
1/4 teaspoon garlic salt
1/4 teaspoon onion salt
1/4 teaspoon salt
1/4 teaspoon paprika
2 tablespoons water, or as needed
1/4 cup vegetable oil for frying
Heat oil in a large skillet over medium-high heat. While the oil is heating, sift the flour, garlic salt, onion salt, (regular) salt, and paprika into a large bowl. Gradually stir in enough water so that the mixture can be drizzled from a spoon.
Dip potato slices into the batter one at a time, and place in the hot oil so they are not touching at first. The fries must be placed into the skillet one at a time, or they will clump together. Fry until golden brown and crispy. Remove and drain on paper towels.
Friday, June 17, 2011
Fried Chicken
Someone once told me that if your're going to eat junk food then it's better to make it at home. Fried chicken is definitely not something we eat very often but man, it's so good! By the way, when I say "someone told me" I am usually referring to Oprah.
Peter was all over this dinner. Either he was starving or he REALLY liked this chicken. I am going with the latter. This recipe was spot-on and I didn't have to make any adjustments. Perfection!
Fried Chicken
Peter was all over this dinner. Either he was starving or he REALLY liked this chicken. I am going with the latter. This recipe was spot-on and I didn't have to make any adjustments. Perfection!
Fried Chicken
Serves 4
1 egg
2/3 cup buttermilk
1 teaspoon hot sauce
1 cup all-purpose flour
1 teaspoon garlic powder
1 teaspoon onion powder
1/2 teaspoon cayenne pepper
1 teaspoon salt
1/2 teaspoon freshly ground black pepper
4 cups canola oil
6 to 8 pieces of chicken
In a baking dish whisk together the egg, buttermilk and hot sauce. In a second baking dish combine the flour, paprika, garlic powder, onion powder, cayenne, salt and pepper.
Heat the canola oil in a Dutch oven over medium-high heat to 350 degrees F.
Dredge the chicken pieces in the flour mixture and shake off excess so they are lightly dusted. Dip them in the buttermilk and egg mixture coating both sides, then put back in flour mixture making sure to coat completely.
Fry the chicken in the hot oil until brown and crispy, approximately 8 to 10 minutes per side. Drain on a wire rack over a baking sheet. Keep warm in a 200 degree oven until ready to serve.
Wednesday, June 15, 2011
Hamburger Buns
Ground beef was on super sale this week so I thought this was the perfect time to try making my own hamburger buns! They seemed easy enough to make and I hate buying those packaged ones from the grocery store. I searched high and low for an easy recipe but couldn't find one that matched what I had in mind. So, I borrowed from a few and created my own! Most of the recipes I found were for something between 8 to 12 buns so I drastically cut the ingredients. Peter and I don't need a ton of hamburger buns in the freezer! We ate 2 and I froze 2 so I guess we'll have hamburgers again sometime soon.
I STILL do not own a Kitchenaid stand mixer so I did this all by hand. Maybe one day I won't have to...
Hamburger Buns
yields 4 buns
1 tablespoon sugar
1/2 packet yeast
1/8 cup warm milk (between 105-115 degrees)
1/2 cup warm milk (between 105-115 degrees)
1 teaspoon vegetable oil
1 teaspoon salt
3 cups all-purpose unbleached flour (I really only ended up using about 2 1/4 cups)
1 egg beaten with 1 tablespoon cold water (egg wash)
In a large bowl, dissolve the sugar in the warm water. Sprinkle the yeast on top of the mixture and let sit for approximately 10 minutes. Once foamy, add the oil, salt, milk and one cup of the flour. Beat vigorously for 2 minutes. Add the remaining flour a 1/4 cup at a time until the dough begins to pull away from the sides of the bowl. The dough will be very relaxed so add just enough flour to keep it from being sticky. On a lightly floured surface, knead the dough for approximately 7 minutes. Transfer the dough ball to an oiled bowl and cover with a damp cloth. Let rise for 1 hour.
After the dough has doubled in size, transfer it to a lightly oiled work surface. Oil your hands and roll the dough into a log like shape, about 16 inches long. Cut into 8 equal portions, about 2 inches each. Roll each section into a ball and then flatten into a disc, about 3 1/2 inches in diameter. Place the discs on a parchment paper lined baking sheet. Space them about 1/2 inch apart so that they will touch after rising. Let sit for about forty five minutes.
Preheat oven to 400 degrees. Before placing in the oven, brush the top of each bun with egg wash. Bake for 10-15 minutes or until golden brown. Remove and place on wire cooling rack.
I STILL do not own a Kitchenaid stand mixer so I did this all by hand. Maybe one day I won't have to...
Hamburger Buns
yields 4 buns
1 tablespoon sugar
1/2 packet yeast
1/8 cup warm milk (between 105-115 degrees)
1/2 cup warm milk (between 105-115 degrees)
1 teaspoon vegetable oil
1 teaspoon salt
3 cups all-purpose unbleached flour (I really only ended up using about 2 1/4 cups)
1 egg beaten with 1 tablespoon cold water (egg wash)
In a large bowl, dissolve the sugar in the warm water. Sprinkle the yeast on top of the mixture and let sit for approximately 10 minutes. Once foamy, add the oil, salt, milk and one cup of the flour. Beat vigorously for 2 minutes. Add the remaining flour a 1/4 cup at a time until the dough begins to pull away from the sides of the bowl. The dough will be very relaxed so add just enough flour to keep it from being sticky. On a lightly floured surface, knead the dough for approximately 7 minutes. Transfer the dough ball to an oiled bowl and cover with a damp cloth. Let rise for 1 hour.
After the dough has doubled in size, transfer it to a lightly oiled work surface. Oil your hands and roll the dough into a log like shape, about 16 inches long. Cut into 8 equal portions, about 2 inches each. Roll each section into a ball and then flatten into a disc, about 3 1/2 inches in diameter. Place the discs on a parchment paper lined baking sheet. Space them about 1/2 inch apart so that they will touch after rising. Let sit for about forty five minutes.
Preheat oven to 400 degrees. Before placing in the oven, brush the top of each bun with egg wash. Bake for 10-15 minutes or until golden brown. Remove and place on wire cooling rack.
Thursday, June 9, 2011
Blueberry Lemon Muffins
Every few weeks I make a batch of breakfast muffins and freeze them so I have something quick to eat in the morning. I also like to have something on hand for easy snacks when I don't feel like eating yet another banana. I have been loving my strawberry cream cheese muffins but I wanted to try something new. I found this recipe and decided I had to try them because I LOVE blueberries and lemons!
I found that the muffins only needed to bake for about 16 minutes before they were ready. I am not sure if that is because of my crazy hot oven or the altitude. Just keep an eye on yours while baking :)
The recipe indicates that it yields 12 muffins but I was able to make 24.
Blueberry Lemon Muffins
3 cups + 1 Tbsp all-purpose flour
I found that the muffins only needed to bake for about 16 minutes before they were ready. I am not sure if that is because of my crazy hot oven or the altitude. Just keep an eye on yours while baking :)
The recipe indicates that it yields 12 muffins but I was able to make 24.
Blueberry Lemon Muffins
3 cups + 1 Tbsp all-purpose flour
1 Tbsp baking powder
1/2 tsp baking soda
1/2 tsp salt
10 Tbsp unsalted butter, cubed and softened
1 cup sugar
2 large eggs
1 Tbsp lemon zest
1 1/2 cup plain full-fat yogurt12 oz blueberries (thawed if frozen)
Demera sugar (optional)
Cream butter and sugar on medium-high speed until light and fluffy, about 2 minutes. Add eggs, one at a time, beating well after each addition. Add lemon zest.
Beat in one-half of dry ingredients. Beat in one-third of yogurt. Beat in remaining dry ingredients in two batches, alternating with the yogurt, until incorporated. Toss blueberries in remaining 1 Tbsp flour and fold in to the batter.
Spray a muffin tin with non-stick spray or line with paper liners. Divide the batter evenly among cups. Sprinkle top lightly with Demera sugar, if using. Bake until muffins are golden brown, 25 to 30 minutes, until a skewer comes out with moist crumbs. Set on wire rack to cool slightly, about 5 minutes.
Wednesday, June 8, 2011
Veggie Pasta
When my mom was visiting a few weeks ago, she made this yummy pasta dinner. It's very simple and great for those nights when you need to use produce before it spoils. I used a few more artichoke hearts than she did because Peter and I really love artichokes! I also decided to add shrimp (just because I had a lot leftover) but I think it would also be very tasty with chicken.
Veggie Pasta
4 ounces whole wheat spaghetti
1/2 pound shrimp, cleaned and deveined
1 can artichoke hearts
1 cup cherry tomatoes
1 cup button mushrooms
1/4 green onion, diced
1 clove garlic, sliced thin
2 tablespoons olive oil
1 1/2 tablespoons grated parmesan cheese
Prepare spaghetti according to package intsructions. Drain and set aside.
In a large pan over medium heat, add the olive oil and garlic. Saute until fragrant and then remove the garlic.
Add the green onion, tomatoes and mushrooms. Keep over medium heat for approximately 3 minutes. Add the artichoke hearts and saute for 5-6 minutes.
Reduce heat slightly and add the shrimp and spaghetti. Combine thouroughly and cook until the shrimp is pink and tender.
Top with parmesan cheese.
Veggie Pasta
4 ounces whole wheat spaghetti
1/2 pound shrimp, cleaned and deveined
1 can artichoke hearts
1 cup cherry tomatoes
1 cup button mushrooms
1/4 green onion, diced
1 clove garlic, sliced thin
2 tablespoons olive oil
1 1/2 tablespoons grated parmesan cheese
Prepare spaghetti according to package intsructions. Drain and set aside.
In a large pan over medium heat, add the olive oil and garlic. Saute until fragrant and then remove the garlic.
Add the green onion, tomatoes and mushrooms. Keep over medium heat for approximately 3 minutes. Add the artichoke hearts and saute for 5-6 minutes.
Reduce heat slightly and add the shrimp and spaghetti. Combine thouroughly and cook until the shrimp is pink and tender.
Top with parmesan cheese.
Labels:
artichokes,
mushrooms,
pasta,
shrimp,
tomatoes
Tuesday, May 10, 2011
Flour Tortillas
After months of searching for a decent flour tortilla in Denver, I finally gave up. They don't know from a good tortilla. In my quest to find an easy and authentic recipe, I found this blog. This lady speaks my language.
These were incredibly easy to make so there is no excuse to ever buy tortillas from the grocery store again...unless you are lucky enough to live near a Fiesta or Central Market. I had to use more milk than the recipe called for but maybe that is because I was using skim milk. Use your own judgement.
Peter liked them but said they were "hard to cut." Poor guy, he can't help that he's from Colorado.
Flour Tortillas
2 cups of all-purpose flour (can make them whole wheat by substituting one cup of whole-wheat flour for white flour)
1 1/2 teaspoons of baking powder
1 teaspoon of salt
2 teaspoons of vegetable oil
1 cup of warm milk
Mix together the flour, baking powder, salt and oil. Slowly add the warm milk.
Stir until a loose, sticky ball is formed.
Knead for two minutes on a floured surface. Dough should be firm and soft.
Place dough in a bowl and cover with a damp cloth or plastic wrap for 20 minutes.
After the dough has rested, break off eight sections, roll them into balls in your hands, place on a plate (make sure they aren’t touching) and then cover balls with damp cloth or plastic wrap for 10 minutes. (It’s very important to let the dough rest, otherwise it will be like elastic and won’t roll out to a proper thickness and shape.)
After dough has rested, one at a time place a dough ball on a floured surface, pat it out into a four-inch circle, and then roll with a rolling pin from the center until it’s thin and about eight inches in diameter. (If you roll out pie crusts you’ll have no problem with this.) Don’t over work the dough, or it’ll be stiff. Keep rolled-out tortillas covered until ready to cook.
In a dry iron skillet or comal heated on high, cook the tortilla about thirty seconds on each side. It should start to puff a bit when it’s done.
Keep cooked tortillas covered wrapped in a napkin until ready to eat.
Can be reheated in a dry iron skillet, over your gas-burner flame or in the oven wrapped in foil.
While you probably won’t have any leftovers, you can store in the fridge tightly wrapped in foil or plastic for a day or so.
Makes eight tortillas.
These were incredibly easy to make so there is no excuse to ever buy tortillas from the grocery store again...unless you are lucky enough to live near a Fiesta or Central Market. I had to use more milk than the recipe called for but maybe that is because I was using skim milk. Use your own judgement.
Peter liked them but said they were "hard to cut." Poor guy, he can't help that he's from Colorado.
Flour Tortillas
2 cups of all-purpose flour (can make them whole wheat by substituting one cup of whole-wheat flour for white flour)
1 1/2 teaspoons of baking powder
1 teaspoon of salt
2 teaspoons of vegetable oil
1 cup of warm milk
Mix together the flour, baking powder, salt and oil. Slowly add the warm milk.
Stir until a loose, sticky ball is formed.
Knead for two minutes on a floured surface. Dough should be firm and soft.
Place dough in a bowl and cover with a damp cloth or plastic wrap for 20 minutes.
After the dough has rested, break off eight sections, roll them into balls in your hands, place on a plate (make sure they aren’t touching) and then cover balls with damp cloth or plastic wrap for 10 minutes. (It’s very important to let the dough rest, otherwise it will be like elastic and won’t roll out to a proper thickness and shape.)
After dough has rested, one at a time place a dough ball on a floured surface, pat it out into a four-inch circle, and then roll with a rolling pin from the center until it’s thin and about eight inches in diameter. (If you roll out pie crusts you’ll have no problem with this.) Don’t over work the dough, or it’ll be stiff. Keep rolled-out tortillas covered until ready to cook.
In a dry iron skillet or comal heated on high, cook the tortilla about thirty seconds on each side. It should start to puff a bit when it’s done.
Keep cooked tortillas covered wrapped in a napkin until ready to eat.
Can be reheated in a dry iron skillet, over your gas-burner flame or in the oven wrapped in foil.
While you probably won’t have any leftovers, you can store in the fridge tightly wrapped in foil or plastic for a day or so.
Makes eight tortillas.
Tuesday, April 26, 2011
Garlic and Lemon Chicken
Once again, I am trying to clean out the kitchen before our move next week. I had some extra chicken breasts and I wanted to try something new. This recipe is very similar to one I posted last month but it was a nice twist on an otherwise routine weeknight meal. Peter declared that he liked this one better than the lemon thyme chicken but I thought they were both great!
Garlic and Lemon Chicken
2 Tbsp. olive oil
2 fat cloves garlic, peeled and slightly smashed
1 lemon, halved
1 egg
1/3 cup breadcrumbs
2 Tbsp. romano or parmesan cheese
1/2 tsp. chopped rosemary
2 chicken breast halves, pounded to about 1/3 – 1/2″ thickness
2 fat cloves garlic, peeled and slightly smashed
1 lemon, halved
1 egg
1/3 cup breadcrumbs
2 Tbsp. romano or parmesan cheese
1/2 tsp. chopped rosemary
2 chicken breast halves, pounded to about 1/3 – 1/2″ thickness
Heat a nonstick skillet over medium-low heat and add the oil. Once the oil is hot, add the garlic and cook, stirring occasionally, until golden brown and soft, about 7 minutes. Remove the garlic with a slotted spoon, and keep the oil in the pan.
Zest half the lemon into a dish or bowl, and to it add the breadcrumbs, cheese, rosemary, and salt and pepper to taste.
Crush the browned garlic cloves and whisk in a separate shallow bowl/dish along with the egg and juice from half the lemon.
Season the chicken with salt and pepper. Dip the chicken into the egg mixture, and then dredge into the breadcrumb mixture.
Heat the garlic oil over medium heat and once hot, add the chicken. Cook until done, about 2.5 minutes per side. Serve with slices or wedges of the remaining half lemon.
Source: Stephanie Cooks
Monday, April 25, 2011
Spaghetti and Meatballs
We are moving next week so I am trying to clean out the kitchen before we go. I noticed that we had quite a bit of spaghetti hanging out in the pantry so I decided to try making meatballs. Many moons ago I made meatballs from scratch and I thought they were fantastic but I was single then and the dog didn't get to try any so yeah, I'm not sure if they were really all that great.
I decided to leave out the chopped onion because the homemade marinara already had a yummy onion flavor. Feel free to add the onion to your meatballs if desired.
Meatballs
makes 10
1/2 pound ground beef
1/2 pound pork sausage
1 egg, slightly beaten
1/2 cup seasoned bread crumbs
1/4 cup pecorino romano cheese, finely grated
1 clove garlic, pressed
1/2 teaspoon oregano
1 teaspoon kosher salt
1/2 teaspoon freshly ground black pepper
Preheat oven to 400 F. Line a baking pan with foil sprayed with non-stick cooking spray.
To make meatballs, mix ground beef, sausage, eggs, bread crumbs, cheese, garlic, oregano, salt, and pepper until combined. Place about ¼ cup of meatball mix in your hand. Form into a ball. Repeat until all meat is used.
Bake about 25 minutes or until meatball juices show no pink color.
I decided to leave out the chopped onion because the homemade marinara already had a yummy onion flavor. Feel free to add the onion to your meatballs if desired.
Meatballs
makes 10
1/2 pound ground beef
1/2 pound pork sausage
1 egg, slightly beaten
1/2 cup seasoned bread crumbs
1/4 cup pecorino romano cheese, finely grated
1 clove garlic, pressed
1/2 teaspoon oregano
1 teaspoon kosher salt
1/2 teaspoon freshly ground black pepper
Preheat oven to 400 F. Line a baking pan with foil sprayed with non-stick cooking spray.
To make meatballs, mix ground beef, sausage, eggs, bread crumbs, cheese, garlic, oregano, salt, and pepper until combined. Place about ¼ cup of meatball mix in your hand. Form into a ball. Repeat until all meat is used.
Bake about 25 minutes or until meatball juices show no pink color.
Monday, April 18, 2011
Tortellini Soup
I have been wanting to try this for a while but something always seemed to come up and prevent me from making this soup. I finally had the perfect opportunity last night. This is so quick and easy to make that I was actually scared it would be bad. I mean, it can't be that easy without being awful, right? I was so wrong. Peter and I loved it and this is something we will definitely eat again!
Tortellini Soup
1 package tortellini, I used whole wheat with cheese
3 cups chicken broth
2 cups fresh spinach, cleaned and stems trimmed
1 roma tomato, seeded and chopped
Parmesan shavings
cracked black pepper
Heat broth over medium heat. Add the tortellini and boil to package instructions. Ladle soup over greens and top with tomato, parmesan and black pepper.
Adapted from Confections of a Foodie Bride
Tortellini Soup
1 package tortellini, I used whole wheat with cheese
3 cups chicken broth
2 cups fresh spinach, cleaned and stems trimmed
1 roma tomato, seeded and chopped
Parmesan shavings
cracked black pepper
Heat broth over medium heat. Add the tortellini and boil to package instructions. Ladle soup over greens and top with tomato, parmesan and black pepper.
Adapted from Confections of a Foodie Bride
Monday, April 11, 2011
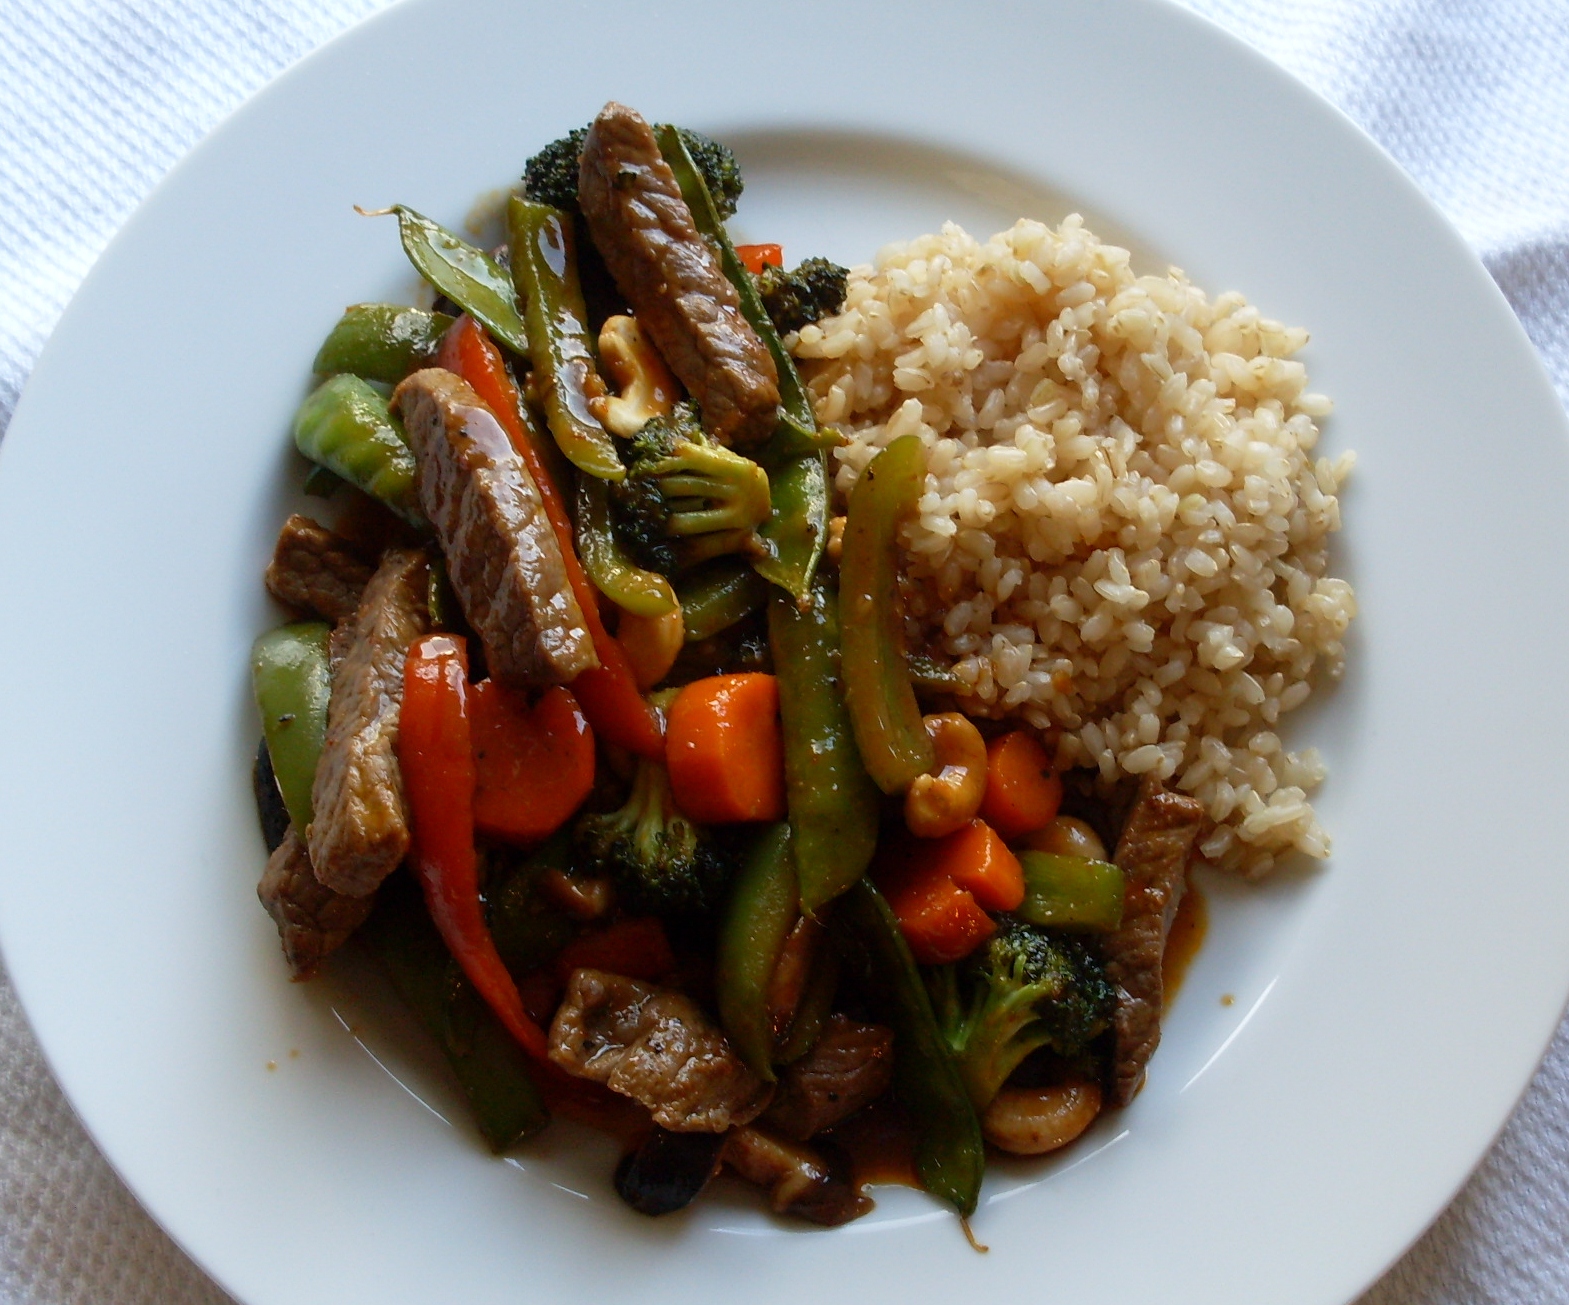
Beef Stir-Fry
Lately I have been craving Asian food. Luckily, I happen to have quite a few leftover veggies from last week that work well in a stir-fry dish. I picked up some beef and a few sauces at the store and planned to throw everything together. You can use any vegetables you happen to have on hand, the more the merrier!
It turned out so great that I think I will repeat this dish later in the week with chicken instead of beef. Yum!
Beef and Vegetable Stir-Fry
1/2 pound top sirloin, cut into 1/4 inch thick slices
1 cup shiitake mushrooms, stemmed and thickly sliced
1 handful snow peas
1/2 cup carrots, peeled and cut into 1/2 inch slices
1 medium size head of broccoli, cut into bite size pieces
1/2 cup green bell pepper, cut into 1/4 inch thick slices
1/2 cup red bell pepper, cut into 1/4 inch thick slices
1 clove garlic, pressed
3 tablespoons canola oil
3 tablespoons hoisin sauce
2 teaspoons siracha sauce
1/2 teaspoon sesame oil
Lightly season beef with salt and pepper. In a wok or large nonstick skillet, heat canola oil over medium-high heat. Add garlic and mushrooms. Stir constantly until mushrooms are tender, about 3 minutes. Add beef and continue cooking an additional minute, until the beef is browned on the outside but still pink in the center. Add snow peas, carrots, broccoli and bell peppers. Cook, stirring constantly, for 1 minute. Stir in hoisin, Siracha and Sesame oil; continue cooking 1-2 minutes, until vegetables are crunchy and beef is cooked through. Serve over rice.
It turned out so great that I think I will repeat this dish later in the week with chicken instead of beef. Yum!
Beef and Vegetable Stir-Fry
1/2 pound top sirloin, cut into 1/4 inch thick slices
1 cup shiitake mushrooms, stemmed and thickly sliced
1 handful snow peas
1/2 cup carrots, peeled and cut into 1/2 inch slices
1 medium size head of broccoli, cut into bite size pieces
1/2 cup green bell pepper, cut into 1/4 inch thick slices
1/2 cup red bell pepper, cut into 1/4 inch thick slices
1 clove garlic, pressed
3 tablespoons canola oil
3 tablespoons hoisin sauce
2 teaspoons siracha sauce
1/2 teaspoon sesame oil
Lightly season beef with salt and pepper. In a wok or large nonstick skillet, heat canola oil over medium-high heat. Add garlic and mushrooms. Stir constantly until mushrooms are tender, about 3 minutes. Add beef and continue cooking an additional minute, until the beef is browned on the outside but still pink in the center. Add snow peas, carrots, broccoli and bell peppers. Cook, stirring constantly, for 1 minute. Stir in hoisin, Siracha and Sesame oil; continue cooking 1-2 minutes, until vegetables are crunchy and beef is cooked through. Serve over rice.
Labels:
beef,
bell peppers,
broccoli,
main dishes,
mushrooms
Sunday, April 3, 2011
Chewy Sugar Cookies
Yesterday Peter and I were walking around Denver in flip-flops and short sleeves. Today it started raining mid-morning and now it's snowing. I got the urge to bake chocolate chips cookies but unfortunately, I had everything except the chocolate chips. Peter offered to run to the store, he must have REALLY wanted chocolate chip cookies, but I found this amazing sugar cookie recipe instead. I think he was a little disappointed but when he saw these come out of the oven he felt better!
Chewy Sugar Cookies
Preheat oven to 350 degrees F (175 degrees C). In a medium bowl, stir together the flour, baking soda, and salt; set aside.
In a large bowl, cream together the margarine and 2 cups sugar until light and fluffy. Beat in the eggs one at a time, then the vanilla. Gradually stir in the dry ingredients until just blended. Roll the dough into walnut sized balls and roll the balls in remaining 1/4 cup of sugar. Place cookies 2 inches apart onto ungreased cookie sheets and flatten slightly.
Bake for 8 to 10 minutes in the preheated oven, until lightly browned at the edges. Allow cookies to cool on baking sheet for 5 minutes before removing to a wire rack to cool completely.
Chewy Sugar Cookies
2 3/4 cups all-purpose flour
1 teaspoon baking soda
1/2 teaspoon salt
1 1/4 cups margarine
2 cups white sugar
2 eggs
2 teaspoons vanilla extract
1/4 cup white sugar for decoration
In a large bowl, cream together the margarine and 2 cups sugar until light and fluffy. Beat in the eggs one at a time, then the vanilla. Gradually stir in the dry ingredients until just blended. Roll the dough into walnut sized balls and roll the balls in remaining 1/4 cup of sugar. Place cookies 2 inches apart onto ungreased cookie sheets and flatten slightly.
Bake for 8 to 10 minutes in the preheated oven, until lightly browned at the edges. Allow cookies to cool on baking sheet for 5 minutes before removing to a wire rack to cool completely.
Thursday, March 31, 2011
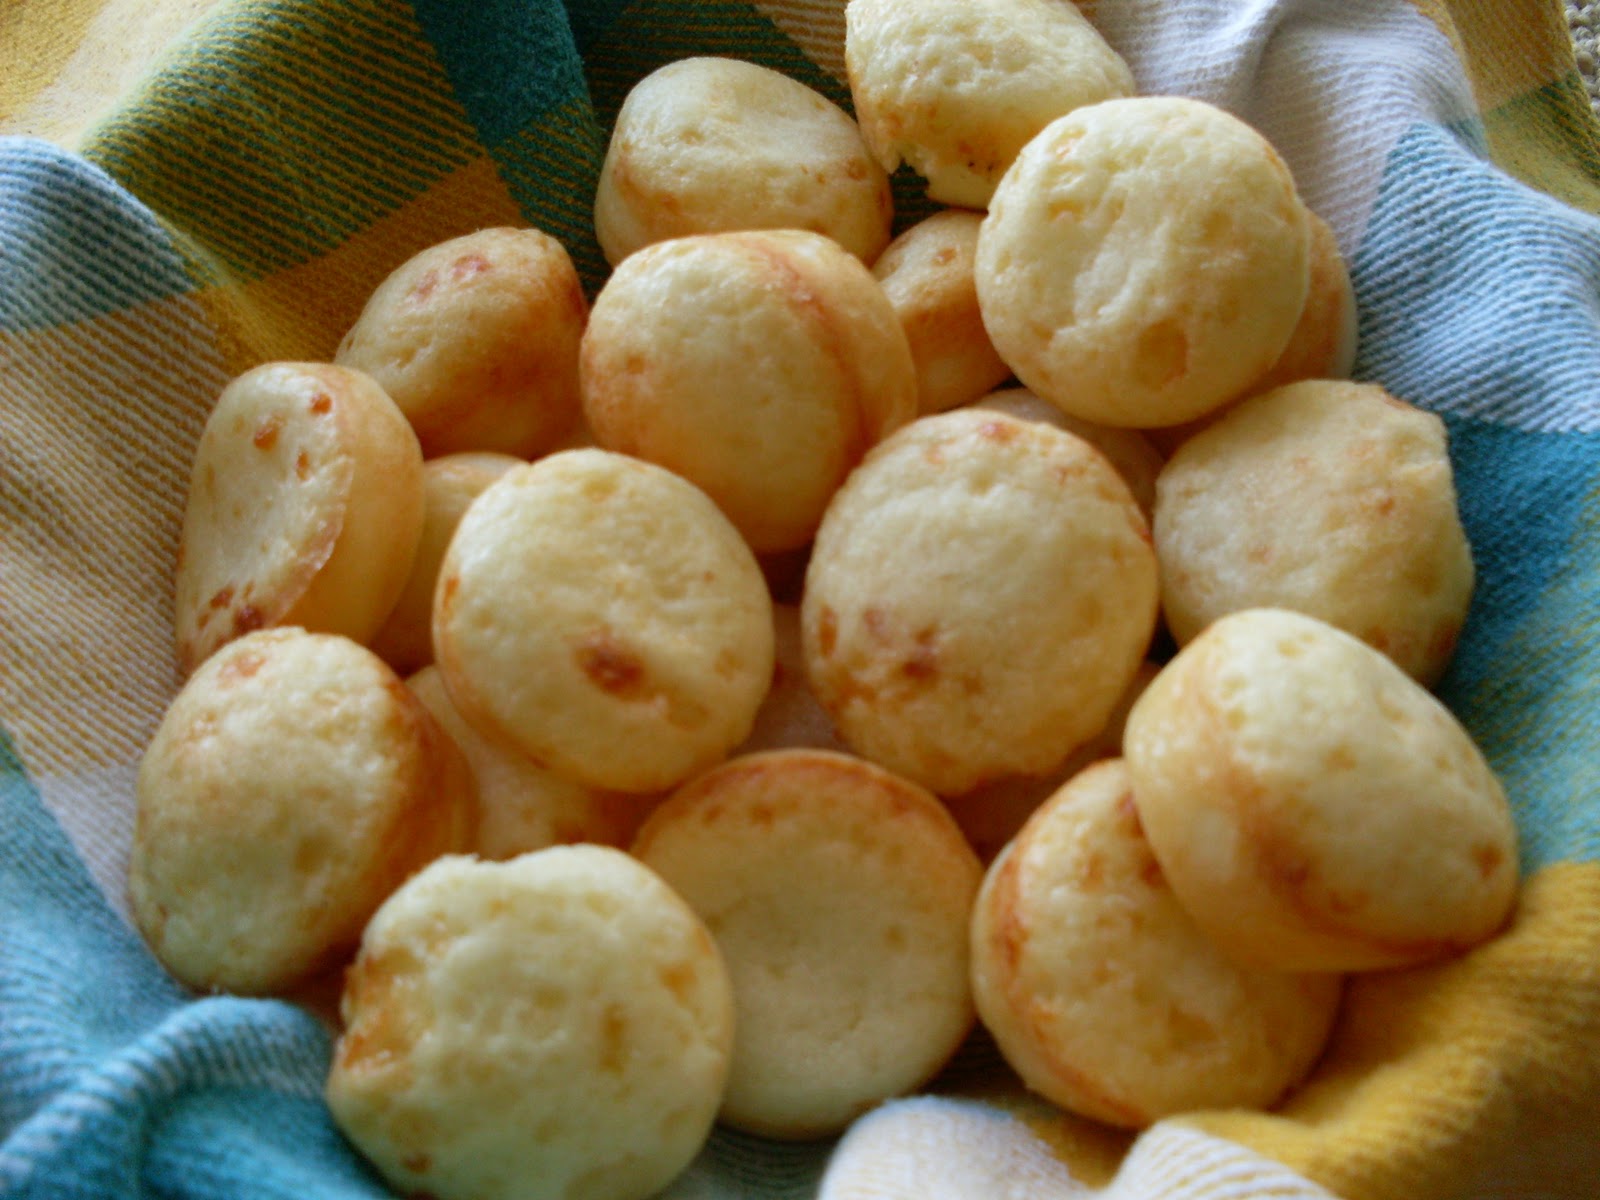
Pao de Queijo
So you know how the powers that be at Fogo de Chao hope you fill up on the salad bar before the parade of meat begins? Yeah, I don't even go to the salad bar. I just wait for the waiter to bring the basket full of cheese bread. Then I fill up on that and don't end up eating much meat at all. That is some expensive bread I've been eating. I needed to find an alternative.
I have been dying to make these for weeks. My friend Susan sent me a recipe that I tried and the results were less than stellar. I was convinced I hadn't read the instructions carefully, so I tried again. The results were no better. I was bummed but after some internet research I realized I was using the wrong kind of tapioca flour. I went back to Whole Foods and could not find the correct type of flour so I ordered online. Five days later I was back in business!
I used this recipe but skipped the blender and the toppings. I cannot adequately describe how amazingly these turned out. I want to eat them all the time.
Pao de Queijo
1/2 cup milk
1/4 cup vegetable oil
1 egg
1 cup tapioca flour
1/4 cup parmesan cheese, grated
1/2 tsp salt
Preheat oven to 400 degrees.
Add all ingredients into a medium mixing bowl. Blend very well, making sure no bits of tapioca starch are left unmixed.
The mixture will be a little thinner than pancake batter. Pour the batter in mini-muffin tins, to no more than 3/4 of their capacity, and cook for 20 minutes. Most will come out right away without sticking. If some stick slightly, allow them to cool for a few minutes and probe them out gently with the tip of a knife. The recipe makes 20-24 little cheese breads.
I have been dying to make these for weeks. My friend Susan sent me a recipe that I tried and the results were less than stellar. I was convinced I hadn't read the instructions carefully, so I tried again. The results were no better. I was bummed but after some internet research I realized I was using the wrong kind of tapioca flour. I went back to Whole Foods and could not find the correct type of flour so I ordered online. Five days later I was back in business!
I used this recipe but skipped the blender and the toppings. I cannot adequately describe how amazingly these turned out. I want to eat them all the time.
Pao de Queijo
1/2 cup milk
1/4 cup vegetable oil
1 egg
1 cup tapioca flour
1/4 cup parmesan cheese, grated
1/2 tsp salt
Preheat oven to 400 degrees.
Add all ingredients into a medium mixing bowl. Blend very well, making sure no bits of tapioca starch are left unmixed.
The mixture will be a little thinner than pancake batter. Pour the batter in mini-muffin tins, to no more than 3/4 of their capacity, and cook for 20 minutes. Most will come out right away without sticking. If some stick slightly, allow them to cool for a few minutes and probe them out gently with the tip of a knife. The recipe makes 20-24 little cheese breads.
Tuesday, March 29, 2011
Spinach Lasagna
Recently we realized that we eat out way too much, especially on the weekends. We have gotten into this bad habit of eating out Friday through Sunday. While it has been fun, it's not exactly figure friendly. In an effort to eat in more on the weekends, I have decided to make one freezer meal every other Monday so we can eat leftovers on Sundays. I have been wanting to try a spinach lasagna for a while. When I was single, I would often stop at Central Market to pick up dinner. They had an amazing spinach lasagna in the prepared foods case. It was amazing!
I found this recipe from a simple Google search and while not exactly like the Central Market version, it was pretty close! I think next time I will substitute a white sauce for the tomato sauce just to try something new!
Spinach Lasagna
Bring a large pot of lightly salted water to a boil. Add lasagna noodles and cook for 8 to 10 minutes or until al dente; drain.
In a skillet over medium-high heat, cook mushrooms, onions, and garlic in olive oil until onions are tender. Drain excess liquid and cool. Boil spinach for 5 minutes. Drain, then squeeze out excess liquid. Chop spinach.
Combine ricotta cheese, Romano cheese, spinach, salt, oregano, basil, pepper, and egg in a bowl. Add cooled mushroom mixture. Beat with an electric mixer on low speed for 1 minute. Lay 5 lasagna noodles in bottom of a 9x13 inch baking dish. Spread one third of the cheese/spinach mixture over noodles. Sprinkle 1 cup mozzarella cheese and 1/3 cup Parmesan cheese on top. Spread 1 cup spaghetti sauce over cheese. Repeat layering 2 times.
Cover dish with aluminum foil and bake in a preheated oven for 1 hour. Cool 15 minutes before serving.
I found this recipe from a simple Google search and while not exactly like the Central Market version, it was pretty close! I think next time I will substitute a white sauce for the tomato sauce just to try something new!
Spinach Lasagna
20 lasagna noodles
2 tablespoons olive oil
1 cup chopped fresh mushrooms
1 cup chopped onion
1 tablespoon minced garlic
2 cups fresh spinach
3 cups ricotta cheese
2/3 cup grated Romano cheese
1 teaspoon salt
1 teaspoon dried oregano
1 teaspoon dried basil leaves
1/2 teaspoon ground black pepper
1 egg
3 cups shredded mozzarella cheese
3 cups tomato pasta sauce
1 cup grated Parmesan cheese
Preheat oven to 350 degrees F.
In a skillet over medium-high heat, cook mushrooms, onions, and garlic in olive oil until onions are tender. Drain excess liquid and cool. Boil spinach for 5 minutes. Drain, then squeeze out excess liquid. Chop spinach.
Combine ricotta cheese, Romano cheese, spinach, salt, oregano, basil, pepper, and egg in a bowl. Add cooled mushroom mixture. Beat with an electric mixer on low speed for 1 minute. Lay 5 lasagna noodles in bottom of a 9x13 inch baking dish. Spread one third of the cheese/spinach mixture over noodles. Sprinkle 1 cup mozzarella cheese and 1/3 cup Parmesan cheese on top. Spread 1 cup spaghetti sauce over cheese. Repeat layering 2 times.
Cover dish with aluminum foil and bake in a preheated oven for 1 hour. Cool 15 minutes before serving.
Nutritional Information
Amount Per Serving Calories: 416 | Total Fat: 16.5g | Cholesterol: 63mg
Labels:
main dishes,
mushrooms,
spinach,
vegetarian
Monday, March 28, 2011
Pommes Anna
My mother-in-law gave me a mandolin for Christmas and I have been wanting to use it ever since. I was recently watching an episode of Secrets of a Restaurant Chef and Anne made Pommes Anna as a steak sidedish. I thought this was a perfect opportunity to use my new kitchen gadget!
I didn't follow her recipe exactly but it was pretty close. The potatoes turned out great! They were perfectly cooked and had a hint of cheese that made them out of this world! I will definitely be making this again!
Pommes Anna
2 large russet potatoes, peeled
3 tablespoons unsalted butter
1/2 cup parmesan cheese, grated
Preheat oven to 350 degrees.
In a small saucepan, melt the butter and set aside.
Using a mandolin on its lowest setting, slice the potatoes as thinly as possible. Lay the slices out on a paper towel and pat dry. In a small oven proof skillet, start to arrange one layer of overlapping potato slices over the bottom of the pan in concentric circles. Pour the melted butter over the sliced potatoes. Repeat 5 more times, making 6 layers. Drizzle each layer with a bit of the butter and sprinkle the layers with parmesan cheese.
Cook on low heat until potatoes are golden on the bottom and crisp around the outside, about 25 to 30 minutes. Shake the pan back and forth several times while cooking to keep from sticking.
Pour off any excess butter into a small bowl and reserve. Place a flat pan lid, the diameter of the skillet, over the potatoes. Holding the lid firmly in place, gently flip over. Add the reserved butter to the pan and slide the potatoes back in. Put the skillet in the oven and bake for 25 to 30 minutes. Shake the pan back and forth several times while cooking to keep the potatoes from sticking. The bottom should be browned and crisp and the potatoes cooked through. Pour off any fat remaining in the pan and slide the potato cake onto a serving dish. Slice into wedges, sprinkle some grated parmesan cheese and serve.
I didn't follow her recipe exactly but it was pretty close. The potatoes turned out great! They were perfectly cooked and had a hint of cheese that made them out of this world! I will definitely be making this again!
Pommes Anna
2 large russet potatoes, peeled
3 tablespoons unsalted butter
1/2 cup parmesan cheese, grated
Preheat oven to 350 degrees.
In a small saucepan, melt the butter and set aside.
Using a mandolin on its lowest setting, slice the potatoes as thinly as possible. Lay the slices out on a paper towel and pat dry. In a small oven proof skillet, start to arrange one layer of overlapping potato slices over the bottom of the pan in concentric circles. Pour the melted butter over the sliced potatoes. Repeat 5 more times, making 6 layers. Drizzle each layer with a bit of the butter and sprinkle the layers with parmesan cheese.
Cook on low heat until potatoes are golden on the bottom and crisp around the outside, about 25 to 30 minutes. Shake the pan back and forth several times while cooking to keep from sticking.
Pour off any excess butter into a small bowl and reserve. Place a flat pan lid, the diameter of the skillet, over the potatoes. Holding the lid firmly in place, gently flip over. Add the reserved butter to the pan and slide the potatoes back in. Put the skillet in the oven and bake for 25 to 30 minutes. Shake the pan back and forth several times while cooking to keep the potatoes from sticking. The bottom should be browned and crisp and the potatoes cooked through. Pour off any fat remaining in the pan and slide the potato cake onto a serving dish. Slice into wedges, sprinkle some grated parmesan cheese and serve.
Subscribe to:
Posts (Atom)